
Instructions for your
Sheket Embroidery Kit
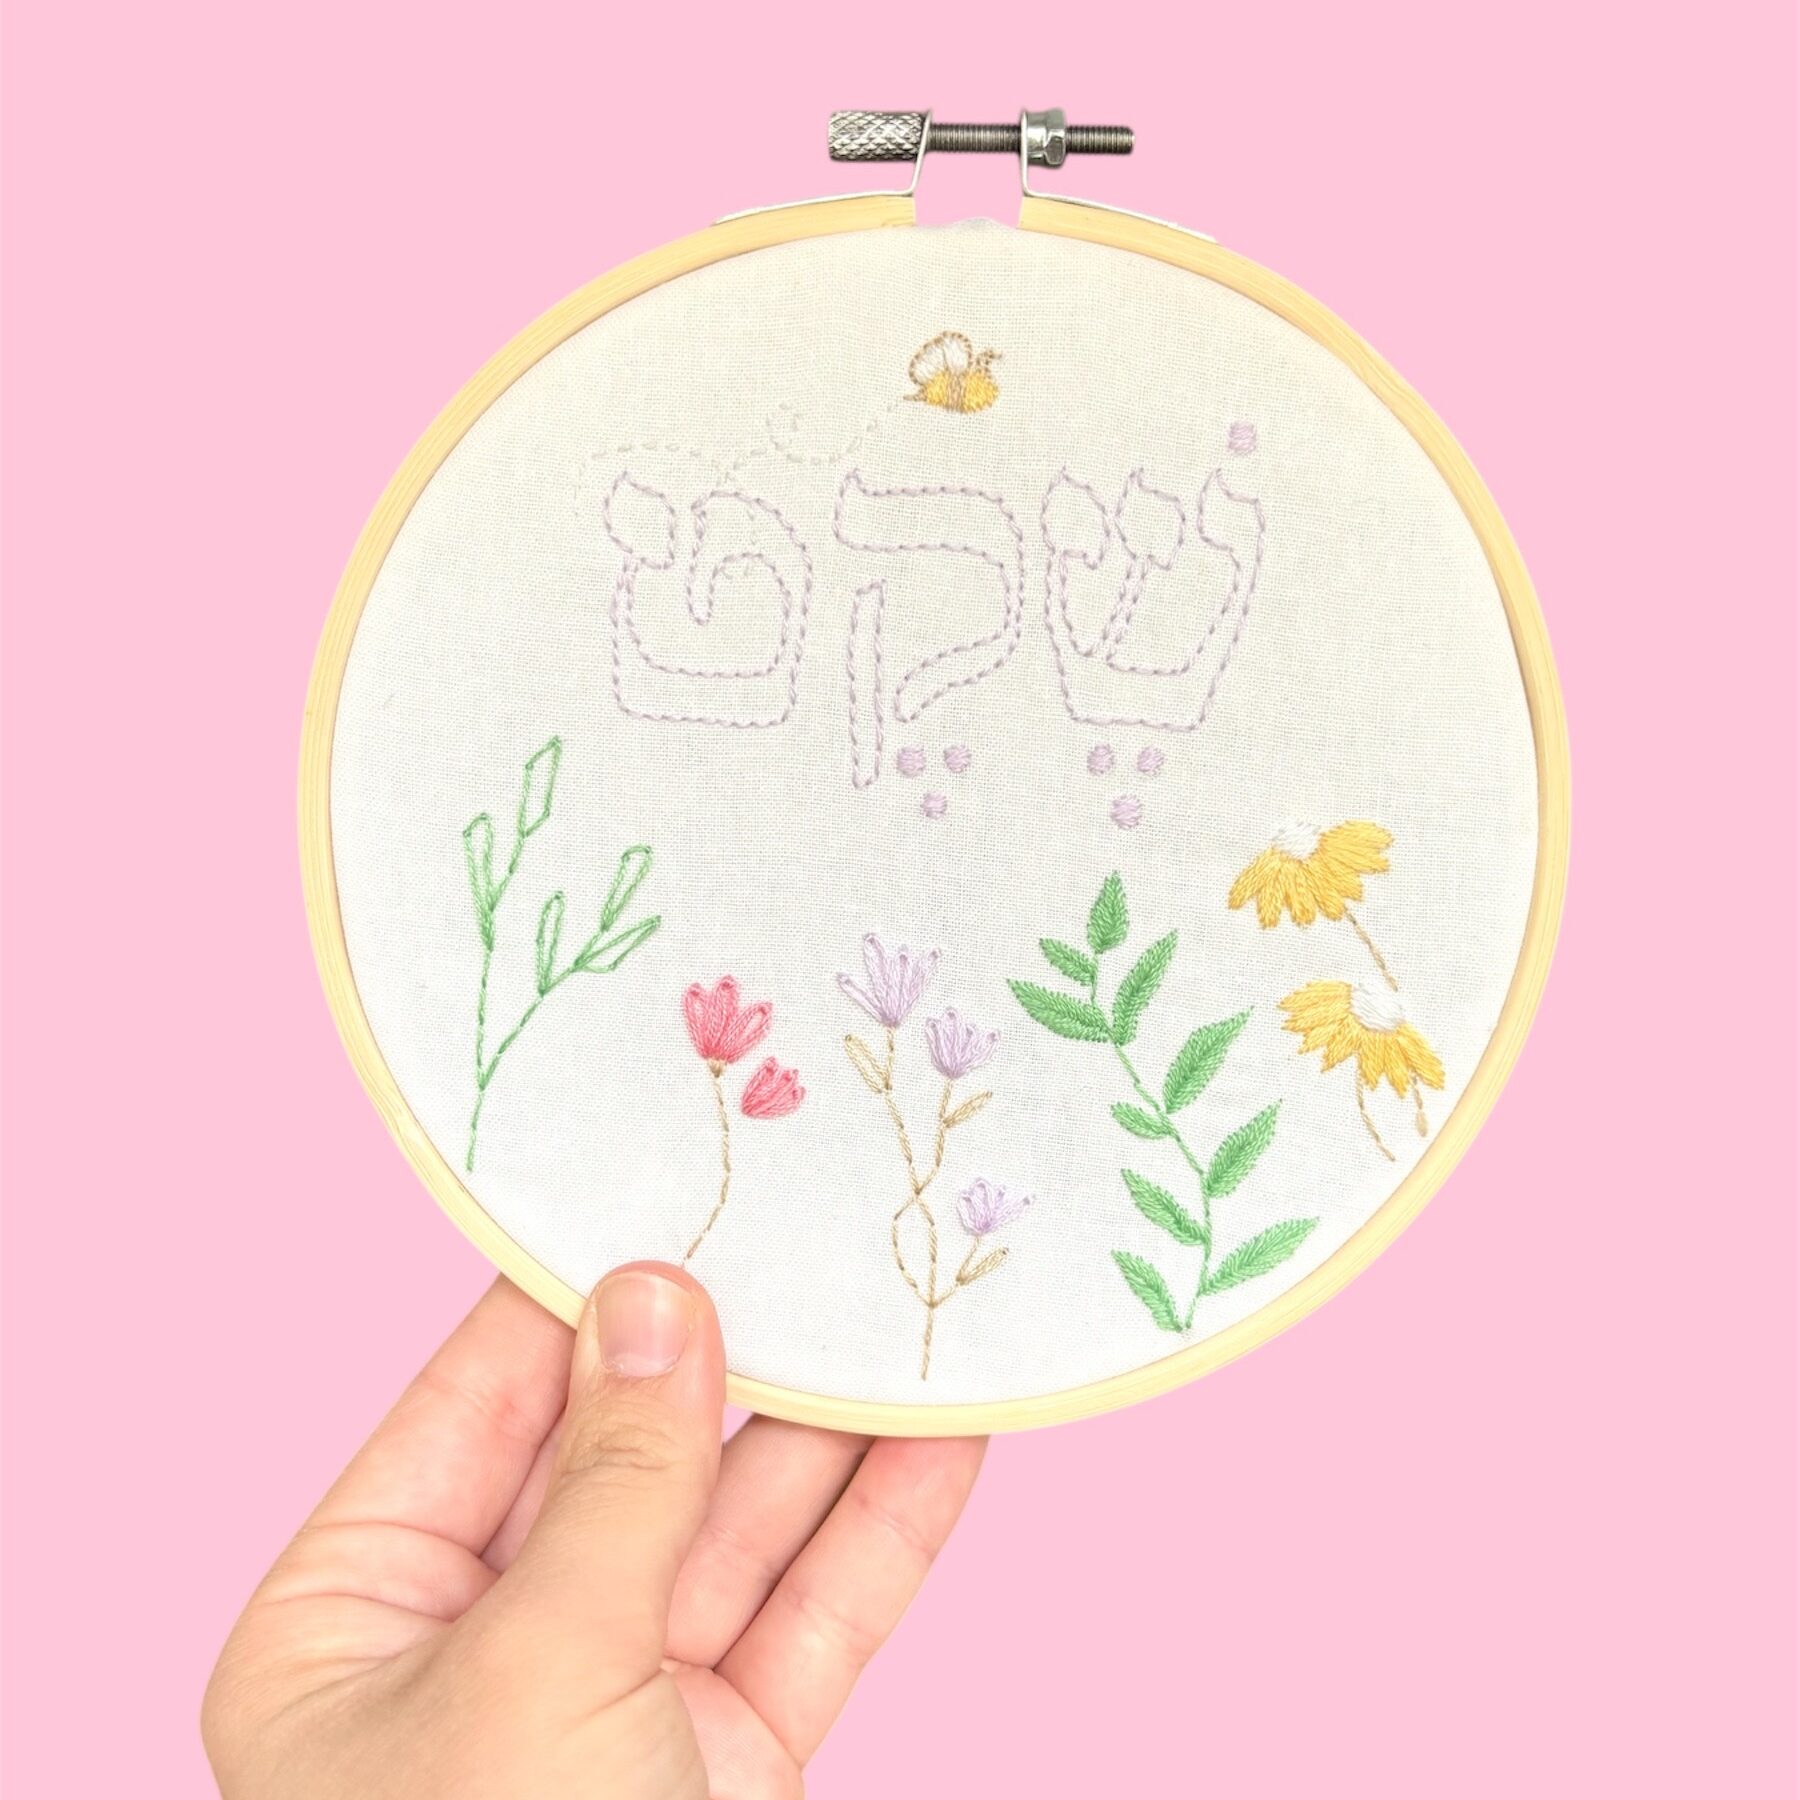
Welcome to your Sheket kit!
Here you’ll find the instructions to make your own רִקְמָה (embroidery) all by yourself!
Just don’t forget to enjoy the peace and שֶׁקֶט (quiet)
What’s Inside?
בַּד – Fabric: 2 layers of white fabric
חֻוטִּים – Threads: Different colors
מַחַט – Needle
חִישּׁוּק – Embroidery hoop: 15 cm (6 inch)
דֻּגְמָה – Pattern (printed on paper)
Step by Step צַעַד צַעַד
1. Stretch the Fabric on the Hoop
- Place both layers of fabric together.
Using two layers will make the בַּד (fabric) less see-through, so you won’t see the threads on the back side when you finish! - Put the double fabric over the inner circle of the hoop. Then place the outer circle on top and tighten the screw.
- Gently pull the edges of the fabric all around until it’s stretched tight like a drum.
2. Transfer the Pattern
- Place the paper with the design underneath the fabric. (Tip: Try to keep the design straight so that the screw of the hoop is at the top and centered. That way, if you want to hang your hoop as a decoration later, you won’t need to adjust the fabric again. Tip2: To keep the pattern from moving while you copy it, use a small piece of tape to secure the paper to the fabric, this will help the design stay perfectly in place.)
- Using a pencil, lightly draw the design onto the fabric.
(Tip: If needed, tape the fabric and paper to a window or use a light under it so it’s easier to see the print behind the fabric.)
Important:
The pattern is not printed directly on the fabric on purpose!
This way, if you want to change something, remove a part, or add your own touch, you are free to do it.
And if you miss a line or stitch differently than the drawing, it doesn’t matter!
(If the design was printed, you would see black lines.)
3. Prepare the Thread
- Cut a thread about 40–50 cm long.
- Separate 2 strands from the 6 strands of the thread. (Do not skip this part! Otherwise you might not have enought threads for the entire pattern. In this kit I only the Lazy-Daisy stitches should have 3-4 threads.)
- Thread your needle using just 2 strands. (Tip: If the thread separates, you can gently lick the end of the thread to make it easier to thread the needle.)
Important:
The amount of each thread color matches what you need for the pattern. Some colors have longer threads, some shorter, you can change the colors if you want, just know that the thread amount matches the original design, so pay attntion to the length of the thread you have.
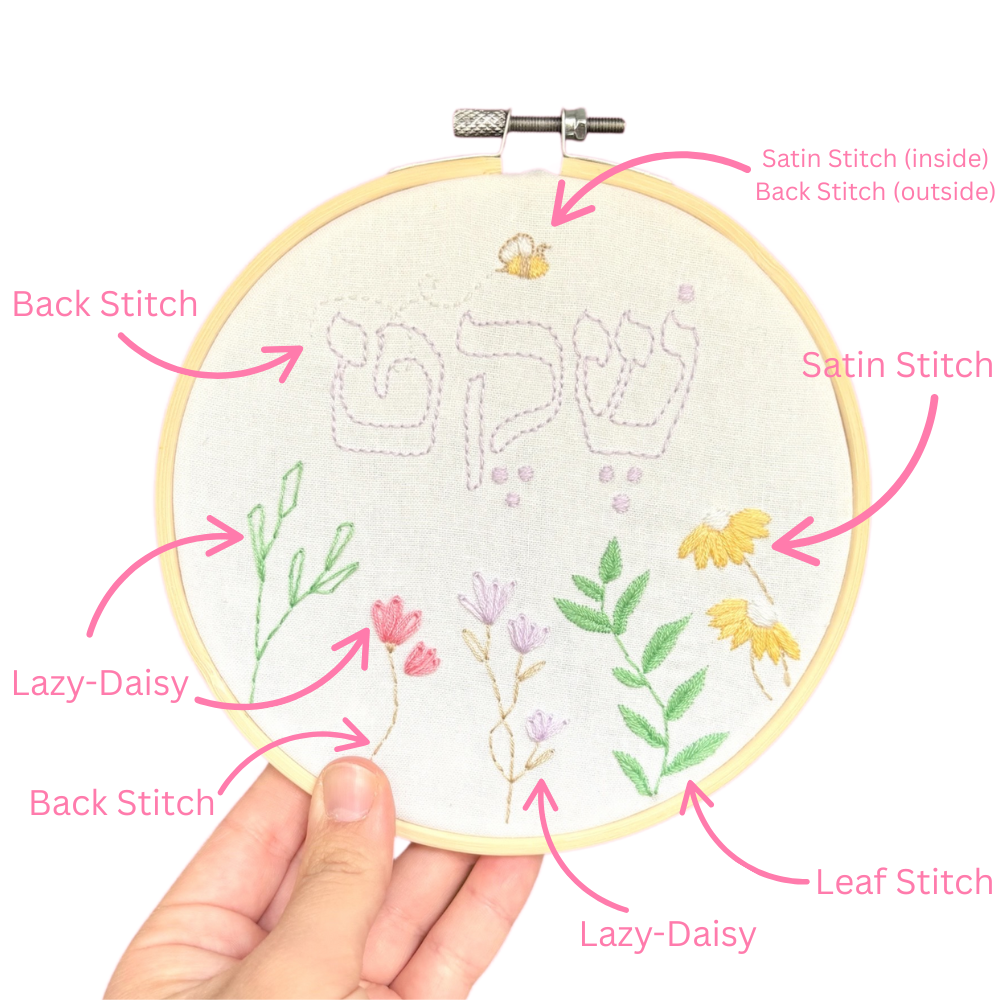
4. Follow the Stitch Instructions
Follow the stitch instructions for each part of the pattern, use this picture to see which stitch to use.
There’s no need to cut the thread after every section, simply continue to the next part that is in the same color. The threads won’t show through the fabric, especially if you used two layers.
Stitch Instructions
The instructions are hard to understand with just words – watch the videos to see how it’s done!
Satin Stitch
- Bring the needle up from the back of the fabric.
- Insert it across the shape you’re filling.
- Make straight stitches side by side until the shape is filled.
Tip:
Divide the shape into smaller sections before stitching to help keep all your satin stitches going in the same direction for a clean, even look.
Leaf Stitch
- Bring the needle up at the top of the leaf.
- Insert it back down at the centre, around halfway of the leaf.
- Bring the needle up again on the left side of the first stitch at the top of the leaf.
- Bring it back to the halfway but this time a tiny bit lower.
- Repeat the same on the other side, alternating the 2 sides.
Back Stitch
- Bring the needle up through the fabric.
- Move forward and insert the needle down.
- Come up a stitch length ahead and go back into the end of the previous stitch.
Lazy Daisy Stitch
- Bring the needle up at the bottom of the petal.
- Insert it back into the same hole (or close to it) and leave a loop.
- Bring the needle up at the tip of the petal and insert the needle into the loop.
- Make a small stitch just above that loop to anchor the loop.
Tip:
For Lazy Daisy stitches, I would recommend using 3–4 strands of thread to make it thicker, and 2 to make it thinner.
In the pattern I used 2 strands for the leaves, but 4 strands for the purple and pink flowers.
5. Final Step: Finish the Back
Now that your embroidery is all done and you’re happy with how it looks, it’s time to tidy it up…
• Trim the excess fabric, leaving about 2–3 cm around the edge.
• Make a running stitch around the edge, then gently pull the thread to gather the fabric like a drawstring. Tie a knot to secure it. (Tip: You can glue a circle of felt or fabric on the back for an extra clean finish.
Now your hoop is ready to hang or gift!
A little more quiet – עוֹד קְצָת שֶׁקֶט
In Hebrew, שֶׁקֶט (sheket) means quiet or silence.
Sometimes, we all need a moment of sheket – to create, to breathe, to pause, to just be.
You can say:
כֹּל כָּךְ רָגוּעַ פֹּה – אֵיזֶה שֶׁקֶט
Kol kakh raguá po – eize sheket.
It’s so peaceful here – what quiet.
אֲנִי צָרִיךְ/צְרִיכָה שֶׁקֶט
Ani tsarikh/tsrikhá sheket.
I need quiet.
קְצָת שֶׁקֶט, בְּבַקָּשָׁה
Ktsat sheket, bevakashá.
A little quiet, please.
Take your time.
Let every stitch bring you closer to the quiet within– שֶׁקֶט (sheket).
Enjoy the soft joy of creating something queitly with your own hands.
בְּאַהֲבָה,
Hadar